An LPR will take pictures and video of license plates and will convert the picture of the license plate to text. It will then use that text to create a database of license plates entering and exiting your property. You can browse through all your captures or search for a specific license plate.
Step 1 - Installation
Below are some requirements of how the LPR camera should be installed.
Entrance & Exit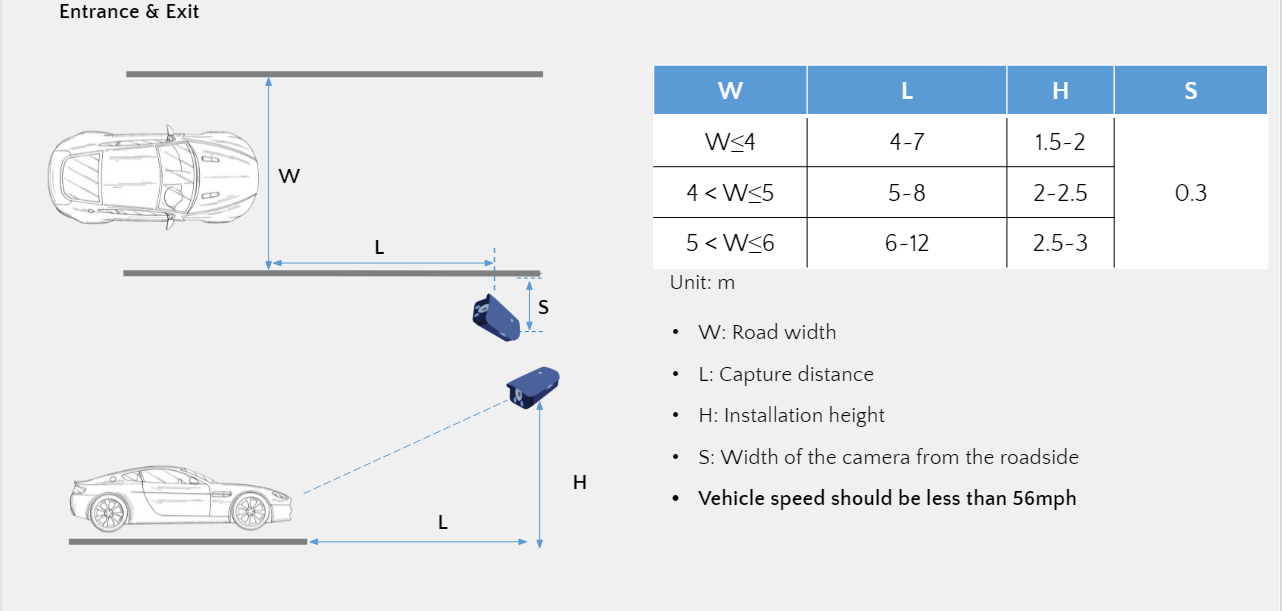
Road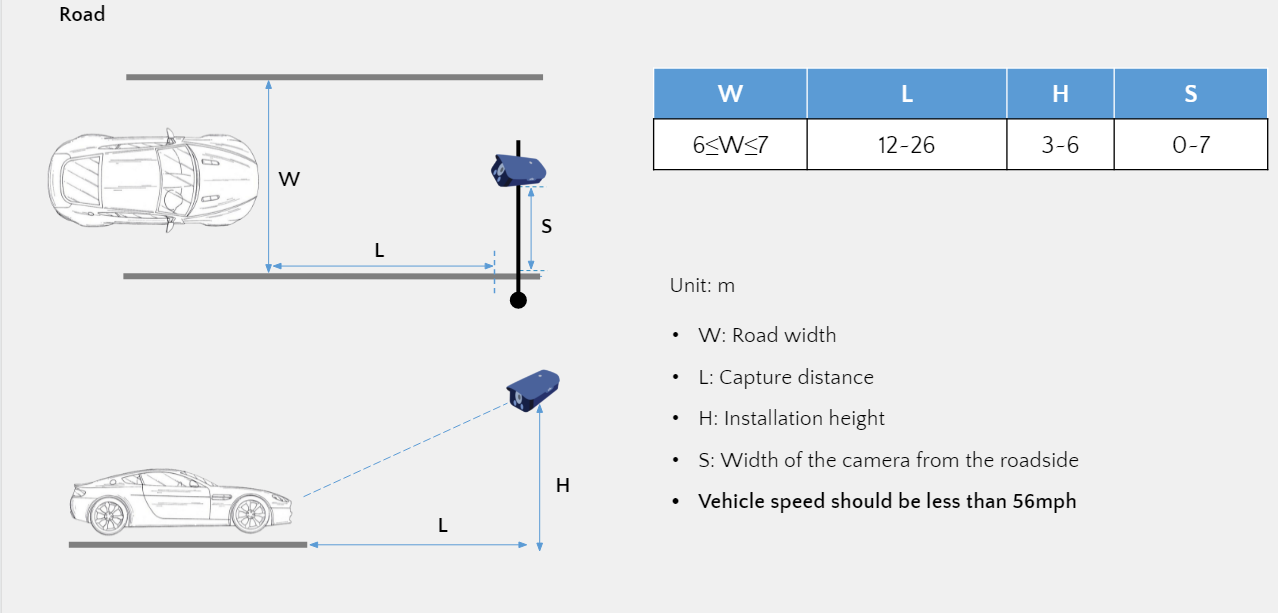
Mounting Angle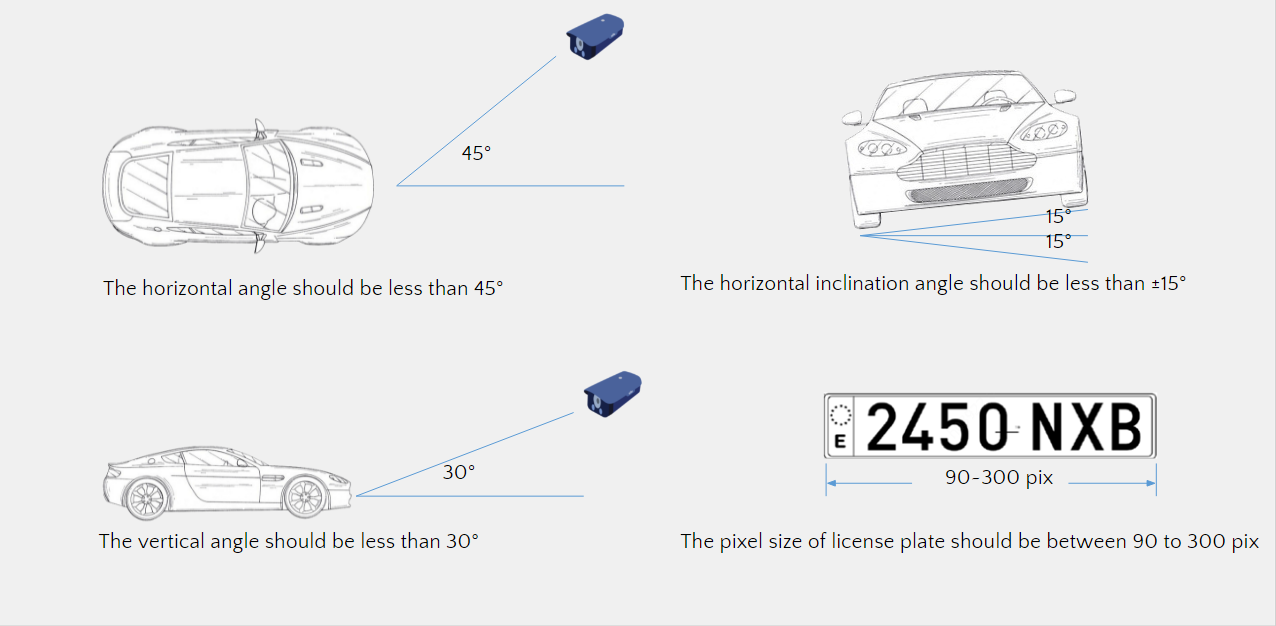
Step 2 - Configuration
In this guide, we will be referencing the HC121@TS8CR-Z's web interface for the LPR Configuration.
From the Live View, Select Setup -> Smart to find the section on configuring the LPR functionality.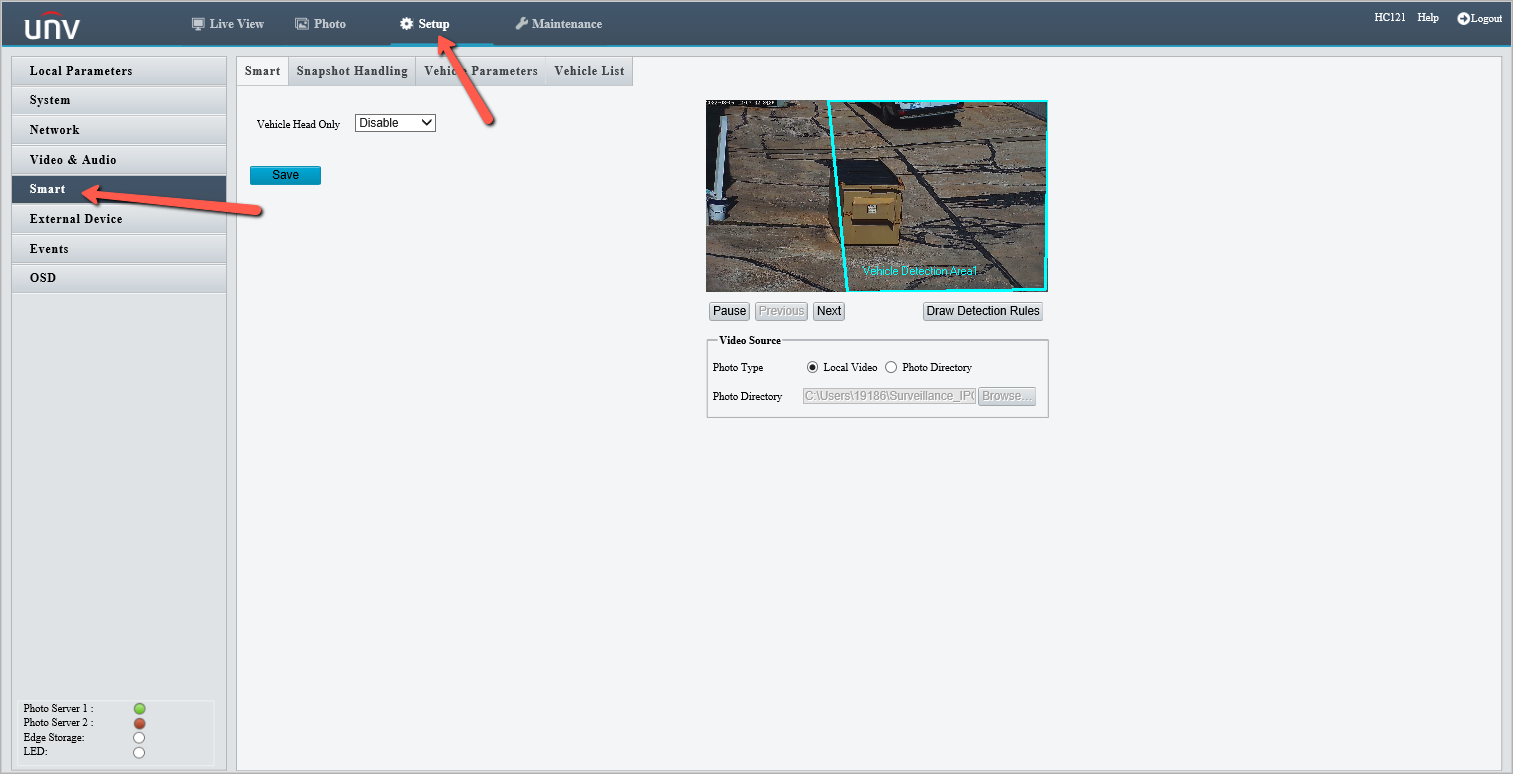
- Vehicle Head Only - The default value is Disabled, indicating that the camera captures both coming and going vehicles. You can change the value to Enable, which indicates that the camera captures only coming vehicles (from the top down).
- Photo Type
- Local Video is selected by default.
- The other available value is Photo Directory.
- The value indicates the image storage path. You can configure it only when Photo Type is set to Photo Directory.
To create the area for the LPR to read plates, Select Draw Detection Rules
A popup window will appear to give you the ability to draw the detection area.
- Draw Detection Area
- The rectangular detection area must be located in the lower part of the image, and the upper edge of the detection area align with the snapshot point.
- The left and right edges of the detection area must overlap the actual lane lines.
- The height of the detection area is recommended to be between 1/4 and 1/3 of the image height.
- Reset All
- You can click this button to restore the vehicle detection area and license plate frame to the default settings.
- Inclination Line
- You can click this button to measure the tilt angle in campuses. When the tilt angle is large, recognition may be incorrect. In this case, you need to adjust the camera angle or installation position. Typically, the license plate should be horizontal.
- The license plate tilt angle due to tilt driving of the vehicle must be less than 30°.
- The license plate tilt angle due to tilt of the camera must be less than 15°.
- You can click this button to measure the tilt angle in campuses. When the tilt angle is large, recognition may be incorrect. In this case, you need to adjust the camera angle or installation position. Typically, the license plate should be horizontal.
Once you have drawn an appropriate area, click OK, then Save.
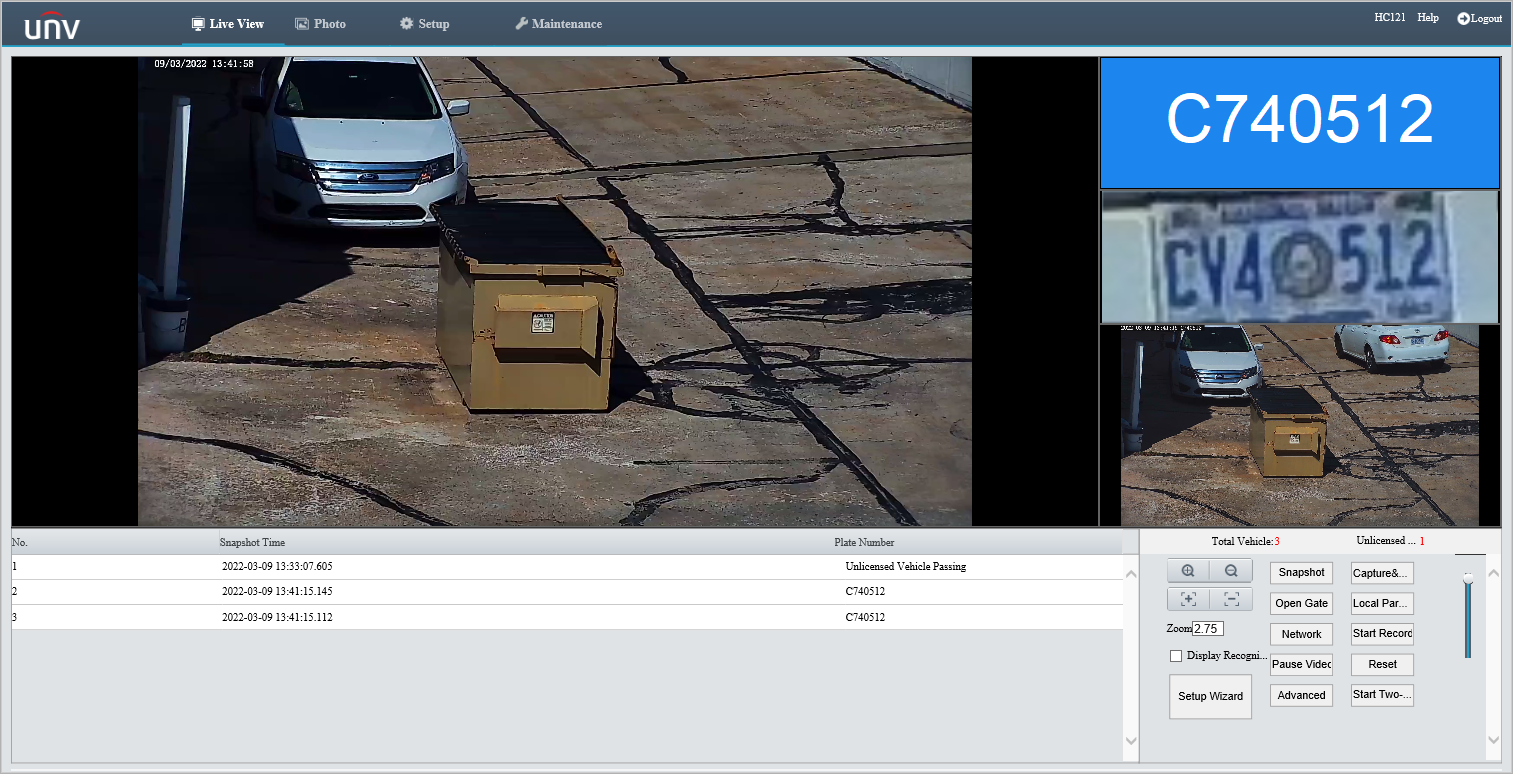
Step 3 - Live View Examples
From the Live View now on the LPR, you should start getting Real Time Results as vehicles drive through the detection area.