Prerequisites:
Only one remote connection type is required for remote access, i.e. both P2P and port forwarding don't need to be done. P2P is considered easier because it doesn't require additional setup on the system.
- System must be connected to a router and programmed on the same network for remote access.
- P2P must show an online or connect success status message for P2P connections.
- A direct connection using a public IP address or a domain name requires the TCP port to be forwarded in the router.
Installation:
Installation instructions apply for both ICRSS Pro and IC View.
- Download the application from the Play Store or App Store.
- In most situations, you can tap the recommended region then save in the top right. If the recommended region is incorrect, select the appropriate region from the list.
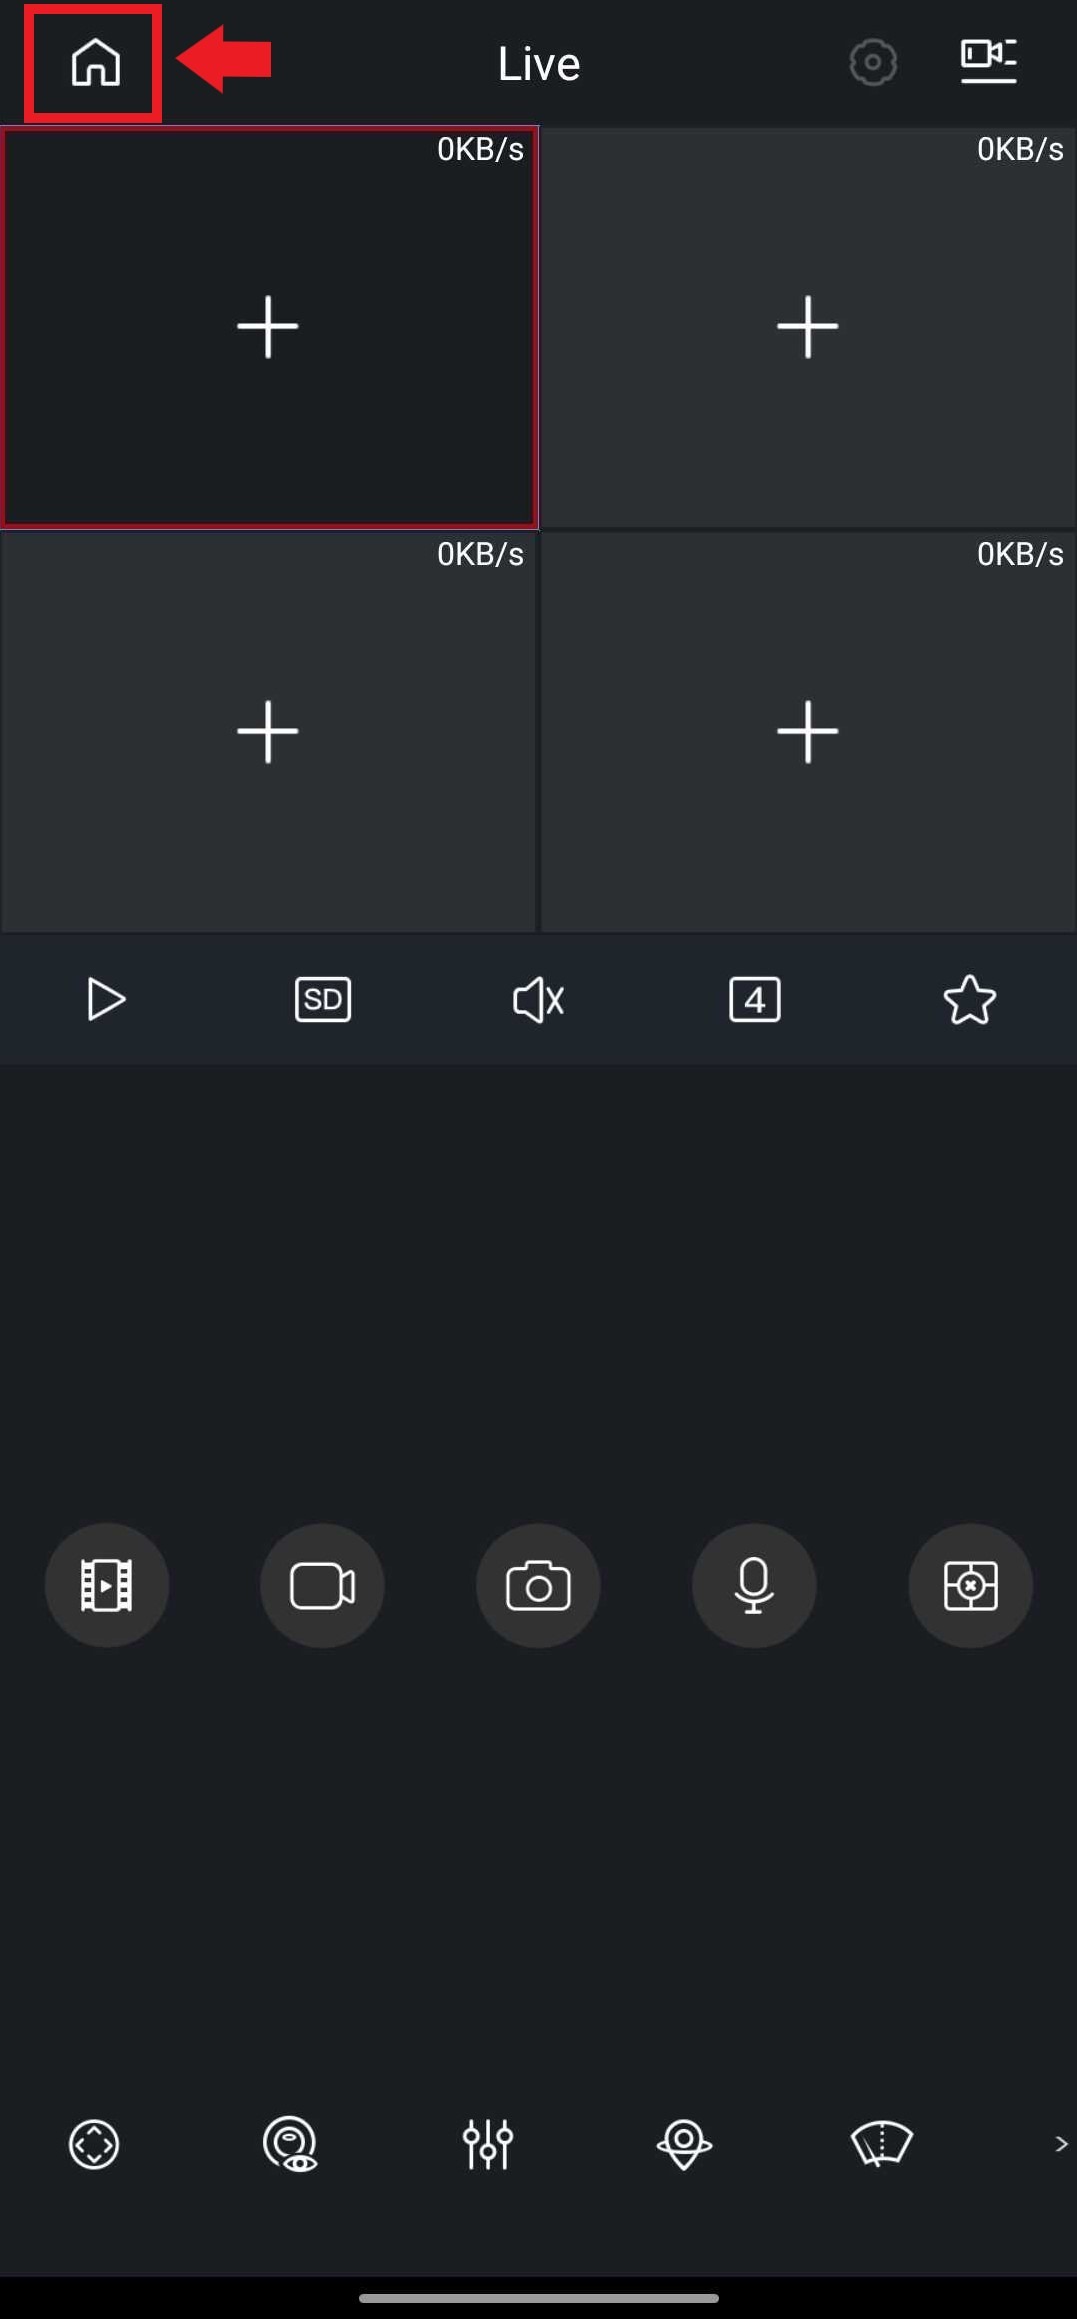
- Select the Home option in the top left

Device Enrollment:
P2P:
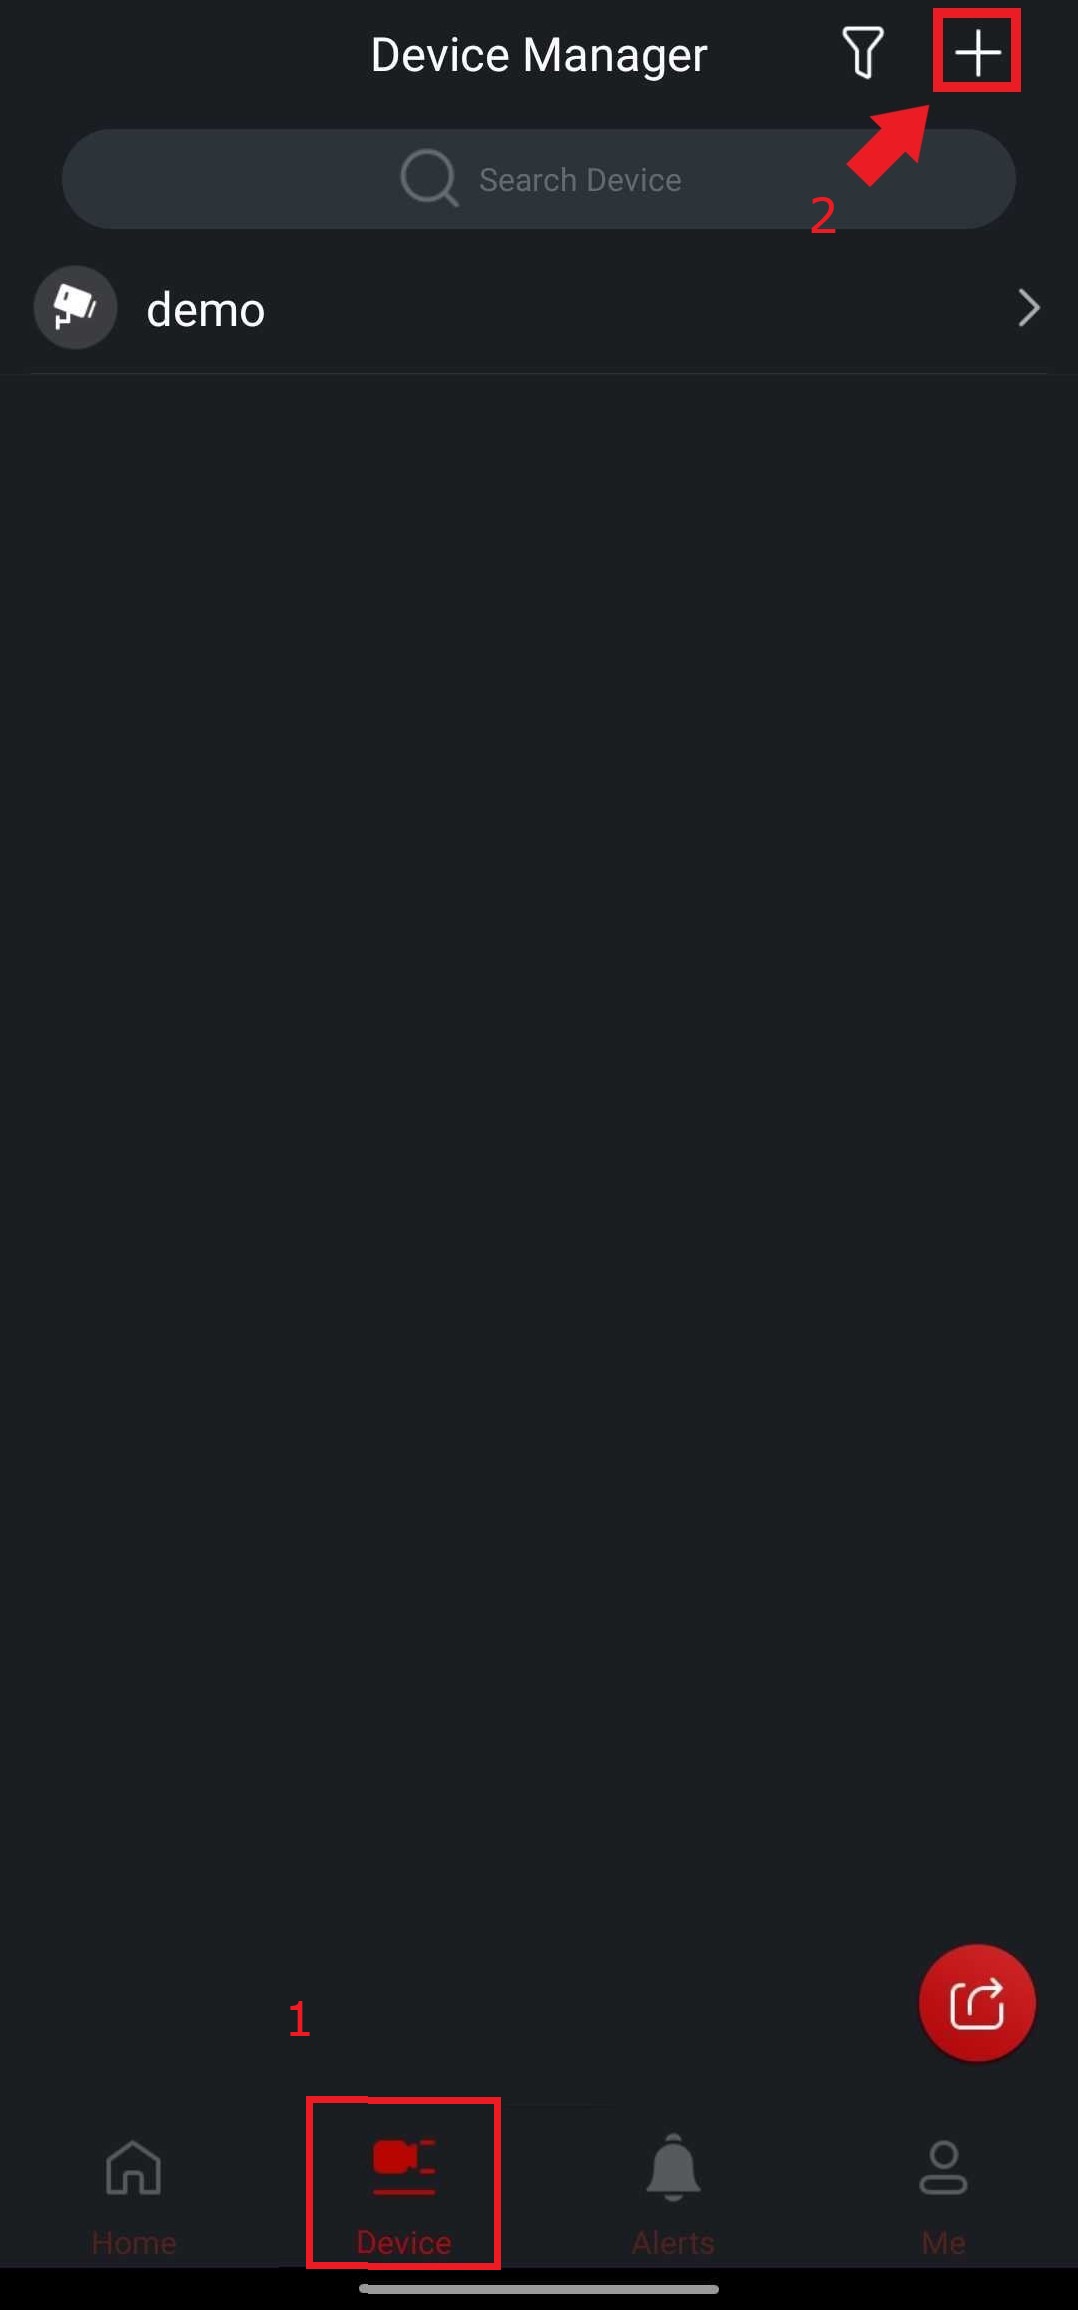
- Select Device from the Navigation Bar.
- Tap the + button in the top-right of the Device Manager window and select P2P/SN.
- You can scan the QR code if you have access to the P2P settings page. Alternatively, you can manually type in the serial number by selecting Manually Enter SN.
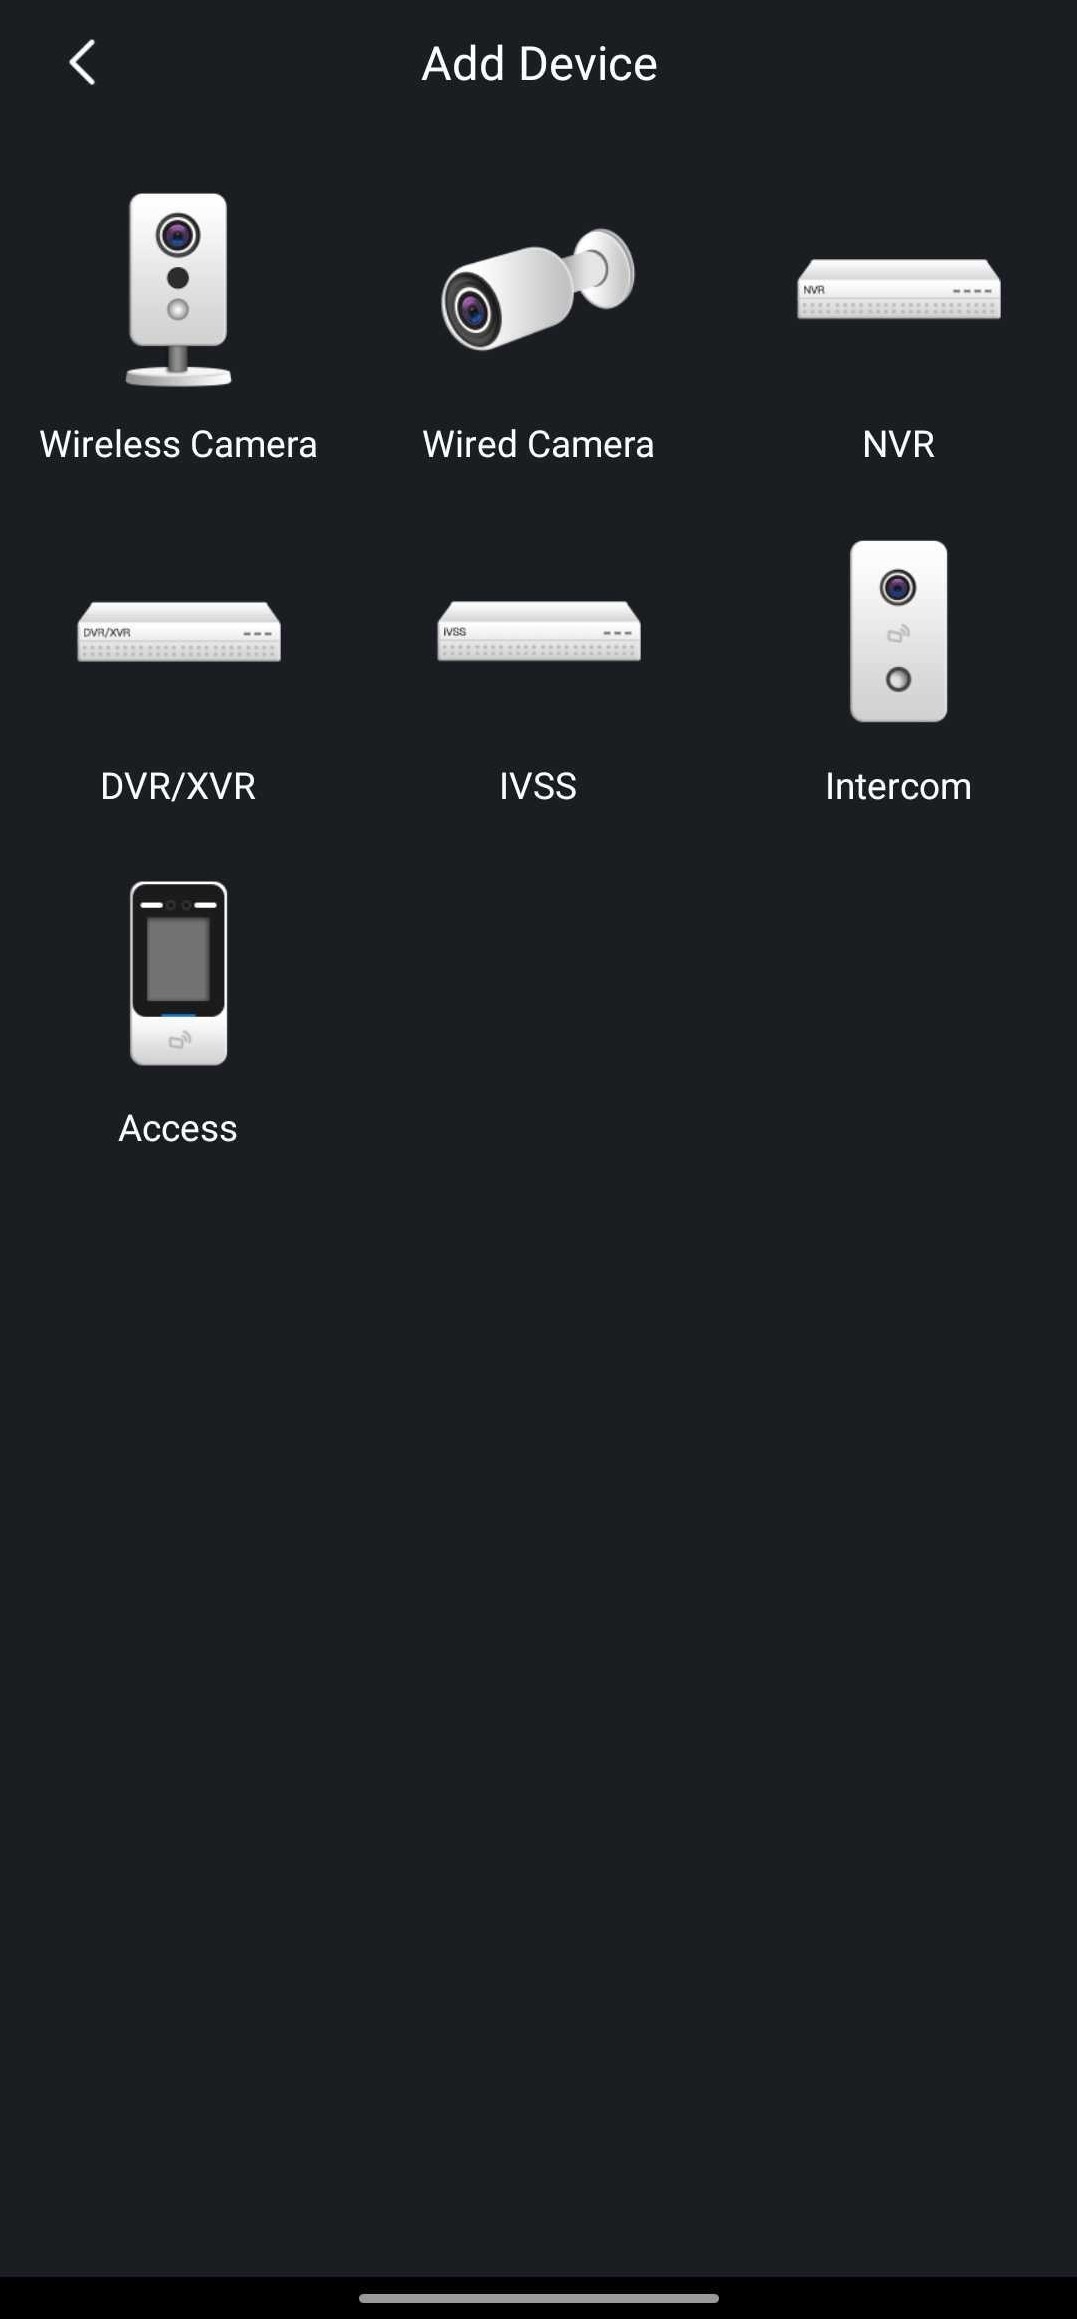
- Select the device type. Most of the time this will be an NVR or a DVR.
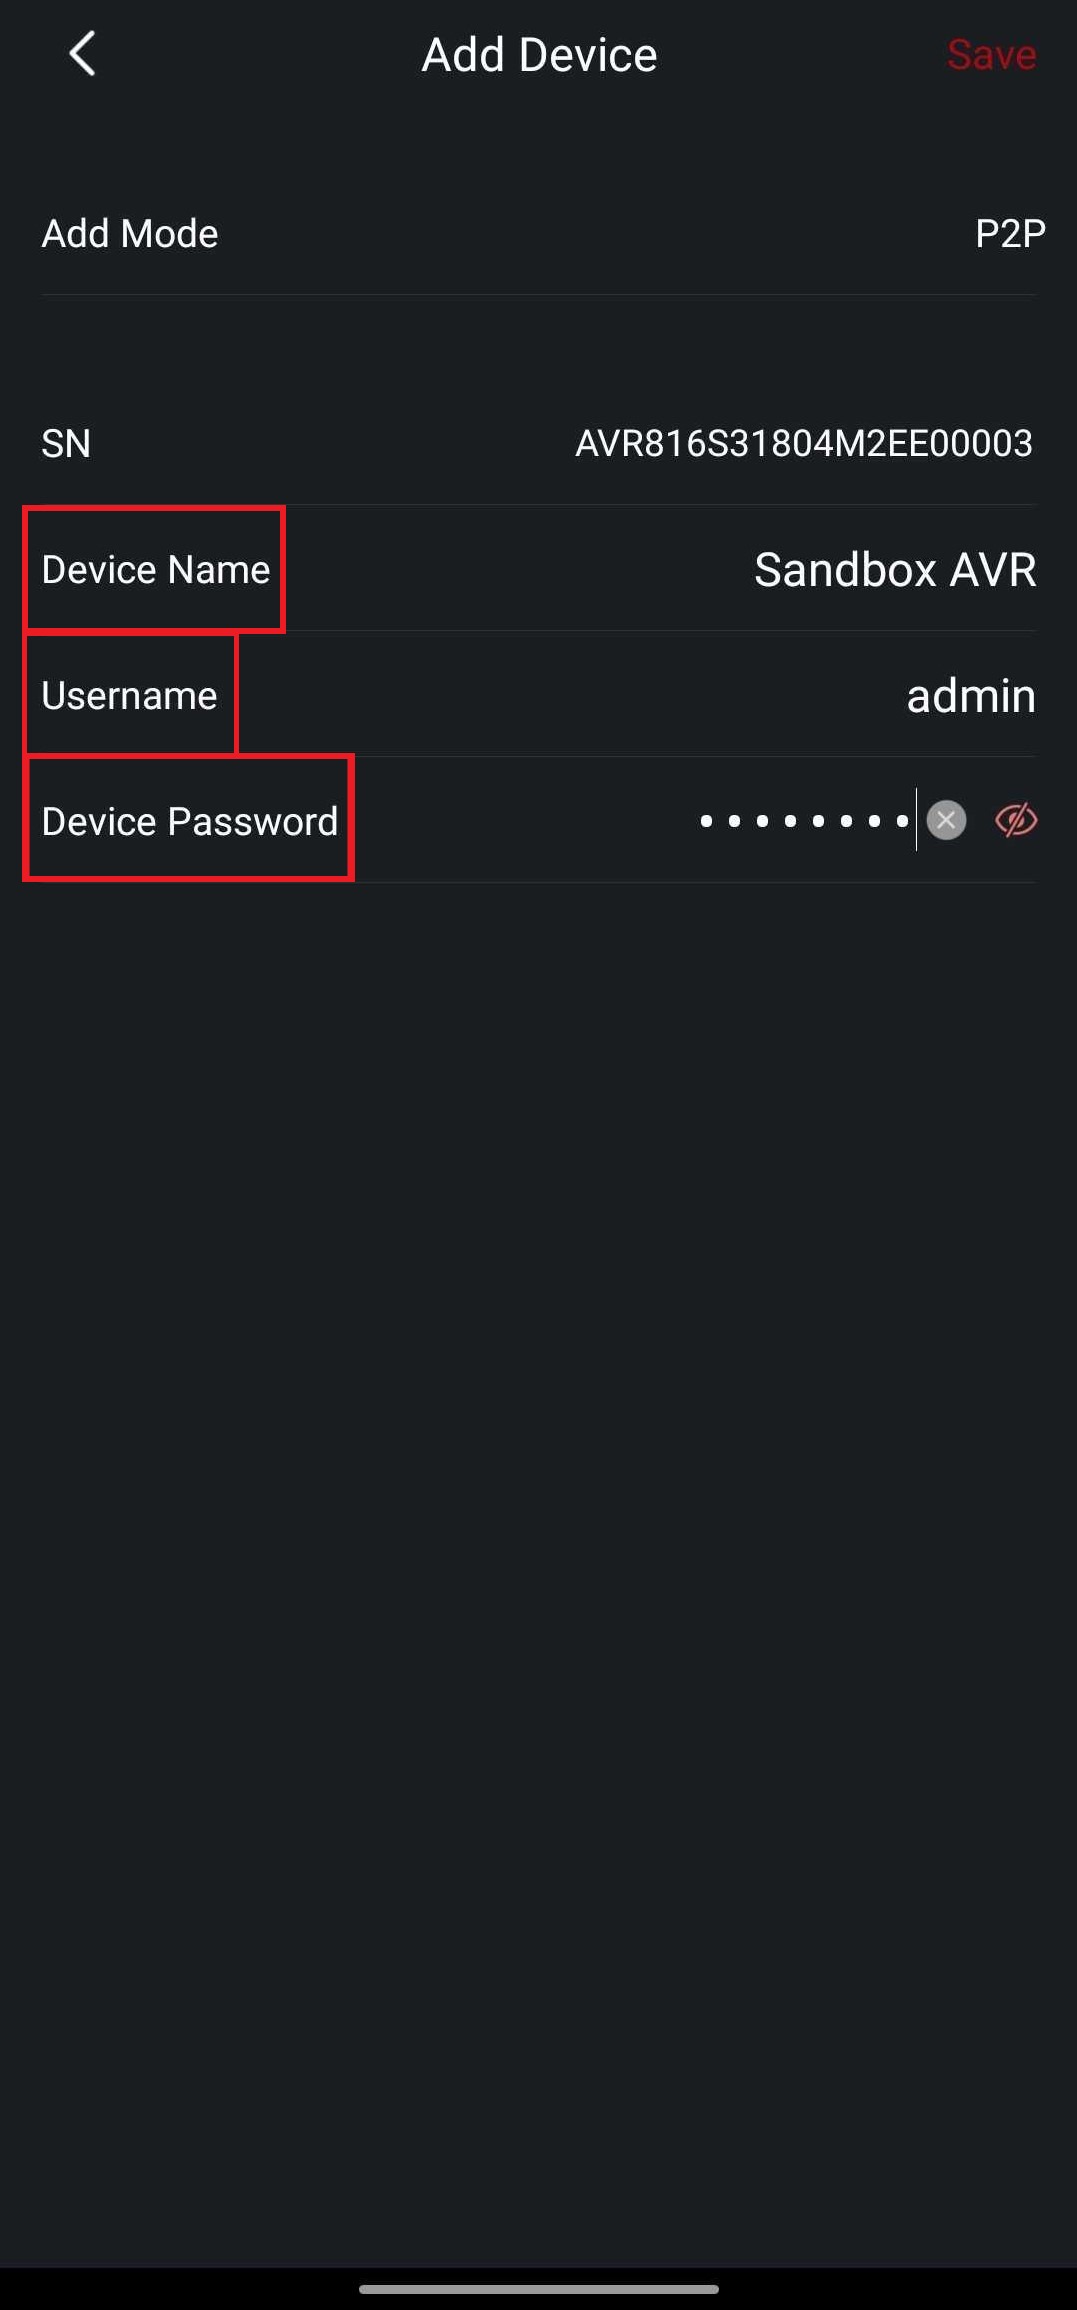
- Fill in the following:
- Device Name - Device Name is how the app refers to the device. You can name this anything.
- Username - The username for the NVR/AVR.
- Password - The password for the NVR/AVR.
- Click the Save button in the top-right after all fields have been completed.

Domain/IP Address:
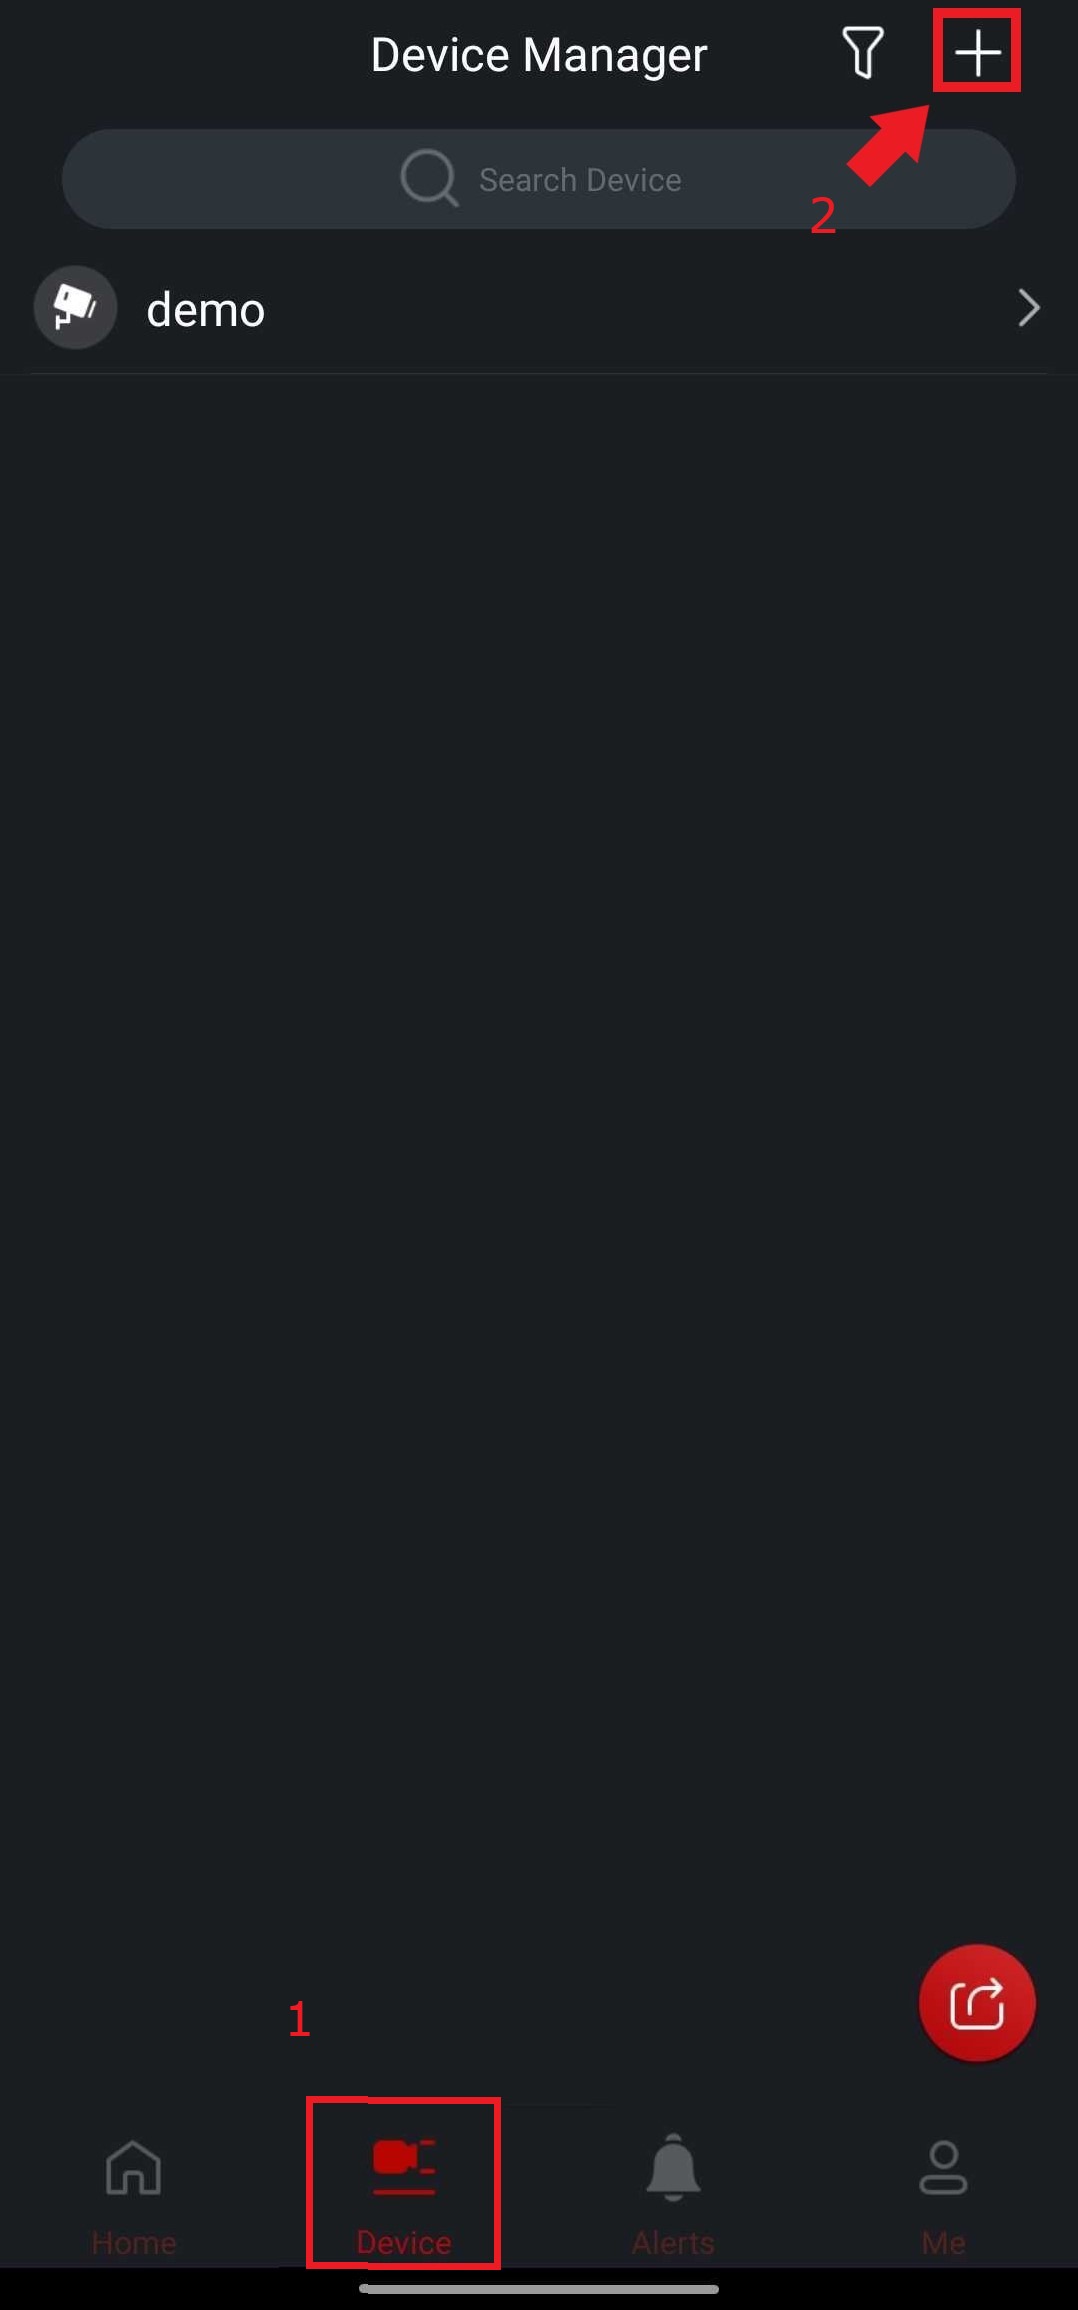
- Select Device from the Navigation Bar.
- Tap the + button in the top-right of the Device Manager window and select IP/Domain
- Select the device type. Most of the time this will be an NVR or a DVR.
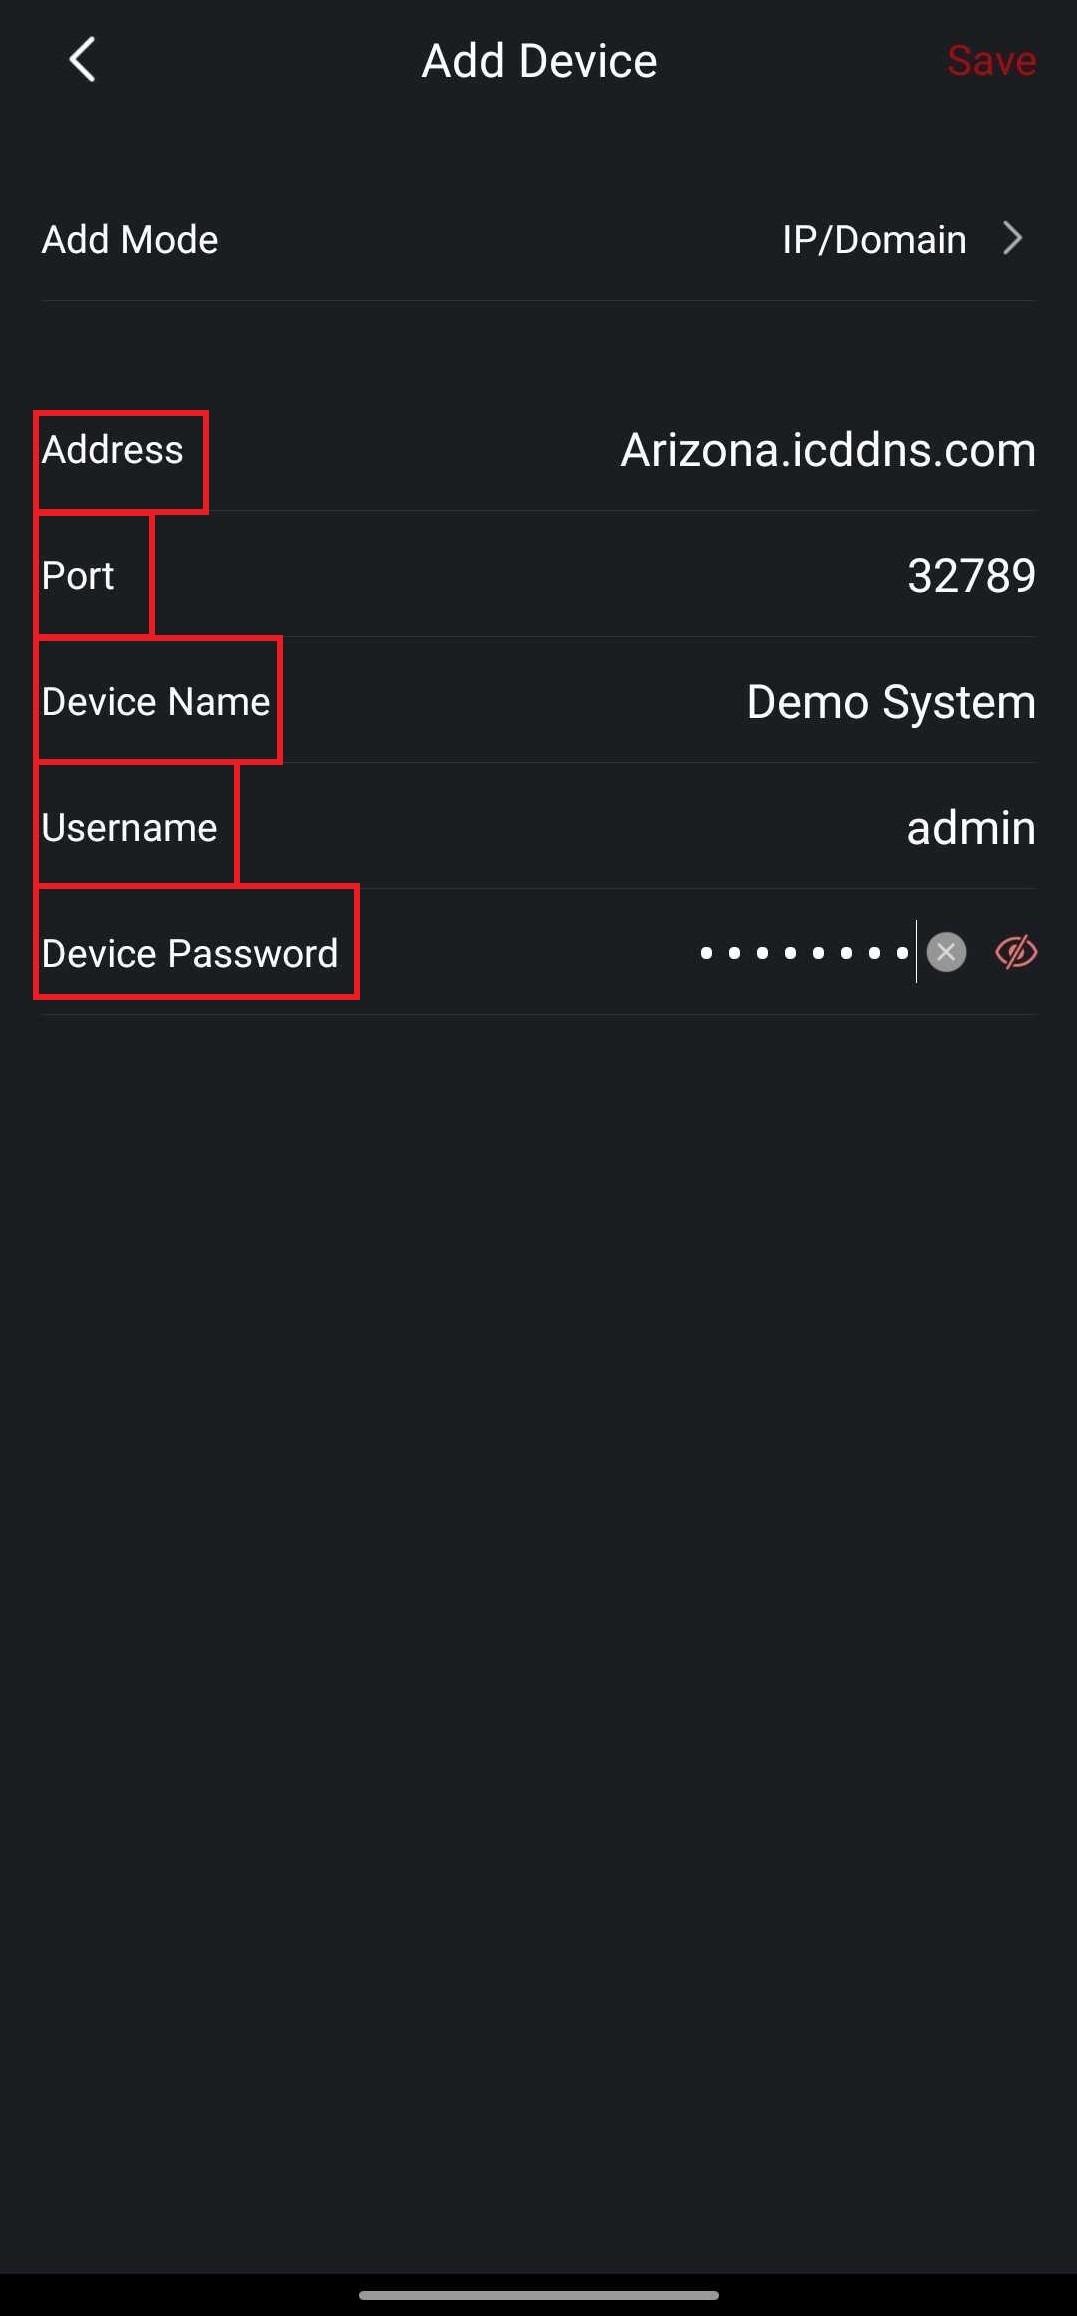
- Fill in the following:
- Address - The IP address or domain name, e.g. [Local: 192.168.1.108] [Public: 35.169.170.49] [Domain: arizona.icddns.com]
- Port - The TCP port of the NVR/AVR. The default values are 32789 or 37777.
- Device Name - Device Name is how the app refers to the device. You can name this anything.
- Username - The username for the NVR/AVR.
- Password - The password for the NVR/AVR.
- Click the Save button in the top-right after all fields have been completed.
Was this article helpful?
That’s Great!
Thank you for your feedback
Sorry! We couldn't be helpful
Thank you for your feedback
Feedback sent
We appreciate your effort and will try to fix the article