The Photo Server is needed for your UNV NVR to store the snapshots that come from the LPR. Which will allow for plate searching on the NVR side.
Step 1 - LPR Setup
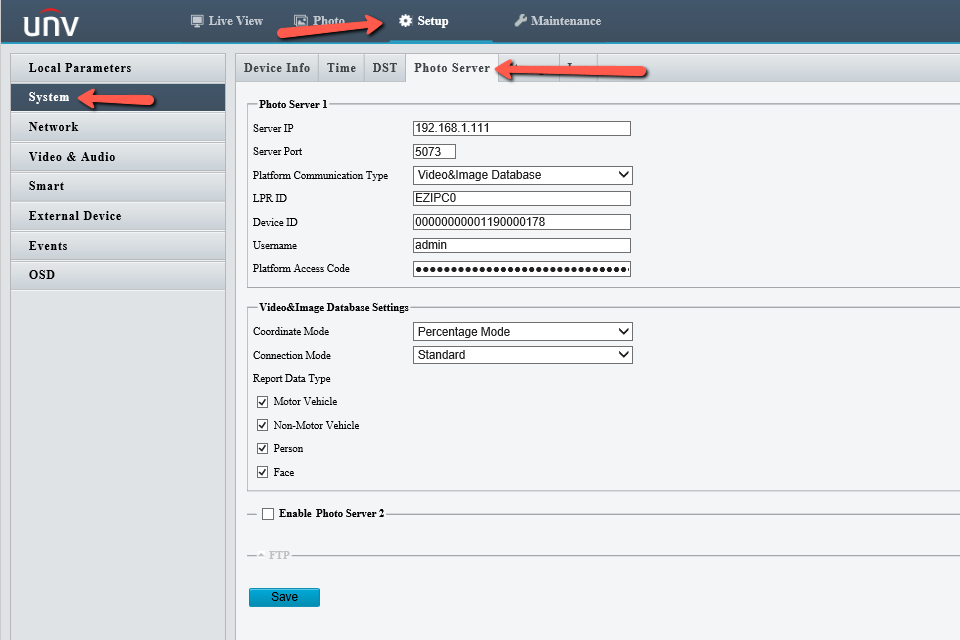
Choose Setup > System > Photo Server, and set Platform Communication Type to Video&Image Database.
Set Server IP to the IP address of the NVR, Server Port to 5073, and LPR ID to any value. Device ID is a 20-digit number unique on the LAN, and digits 11–13 must be 119. Username and Platform Access Code are the username and password for login to the server/NVR.
Video&Image Database Settings - choose Pixel Mode or Percentage Mode to display the coordinate
information of detection objects.
Note
- Video&Image Database Settings is available to certain models only.
- Pixel mode coordinate X/Y= (Percentage mode coordinates*image width/height)/10000.
Step 2 - NVR Setup
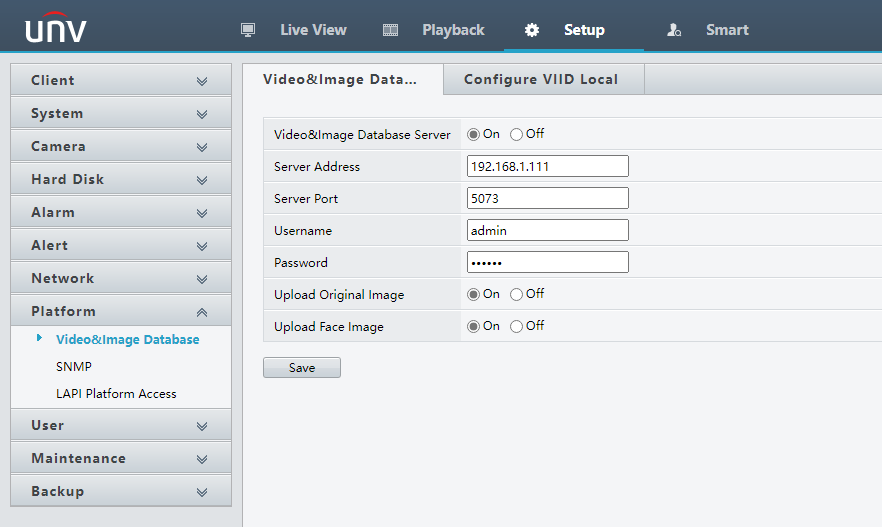
Enable the Video&Image Database Server and more options will appear:
- Server Address - IP Address of NVR
- Server Port - Default is 5073
- Username - Username of NVR
- Password - Password of NVR
- Upload Original Image - ON by Default
- Upload Face Image - ON by Default
Add the camera to a platform, for example, NVR304-16X: Log in to the NVR, and choose Setup > Platform > Video&Image Database -> Configure VIID Local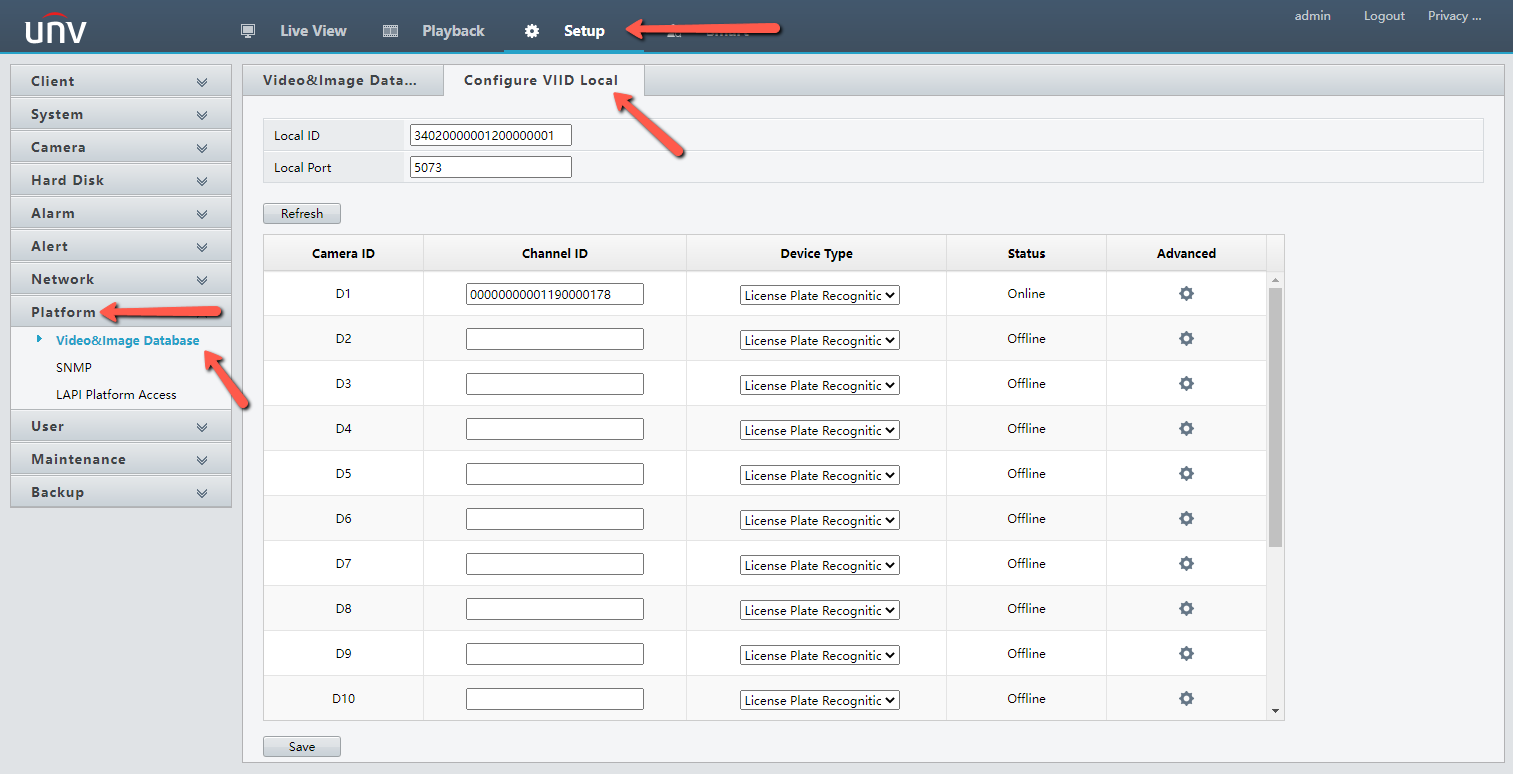
Keep the default values of Local ID and Local Port. If configuration is necessary, set Local ID to a 20-character string unique on the LAN with digits 11–13 as 120. Local Port is set to 5073 by default.
Select the same channel that the LPR is on, such as D1 in this example, Enter Camera ID, which is Device ID in step 1.
Click Save to save the configuration. Then, check the Status column. Online indicates that the camera is successfully registered.
Step 3 - LPR Confirmation
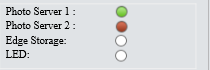
After successful registration on the NVR, log in to the camera and check whether the indicator of Photo Server 1 turns to "?".