One of the quickest and easiest ways to export video from your NVR hard drive is to use the free computer application, CamViewer (available for Windows and Mac). You won’t have as many options when it comes to exporting as you would with the HDMI interface, but you can have immediate access to these files wherever you wish to store them on your computer.
We also have guides for exporting video from your NVR interface and from the EyeCam mobile app.
Configuring Your Computer's Settings (Optional but Recommended)
Navigate to the “System Configuration” menu
To do this, click on the gear icon at the top of the screen.
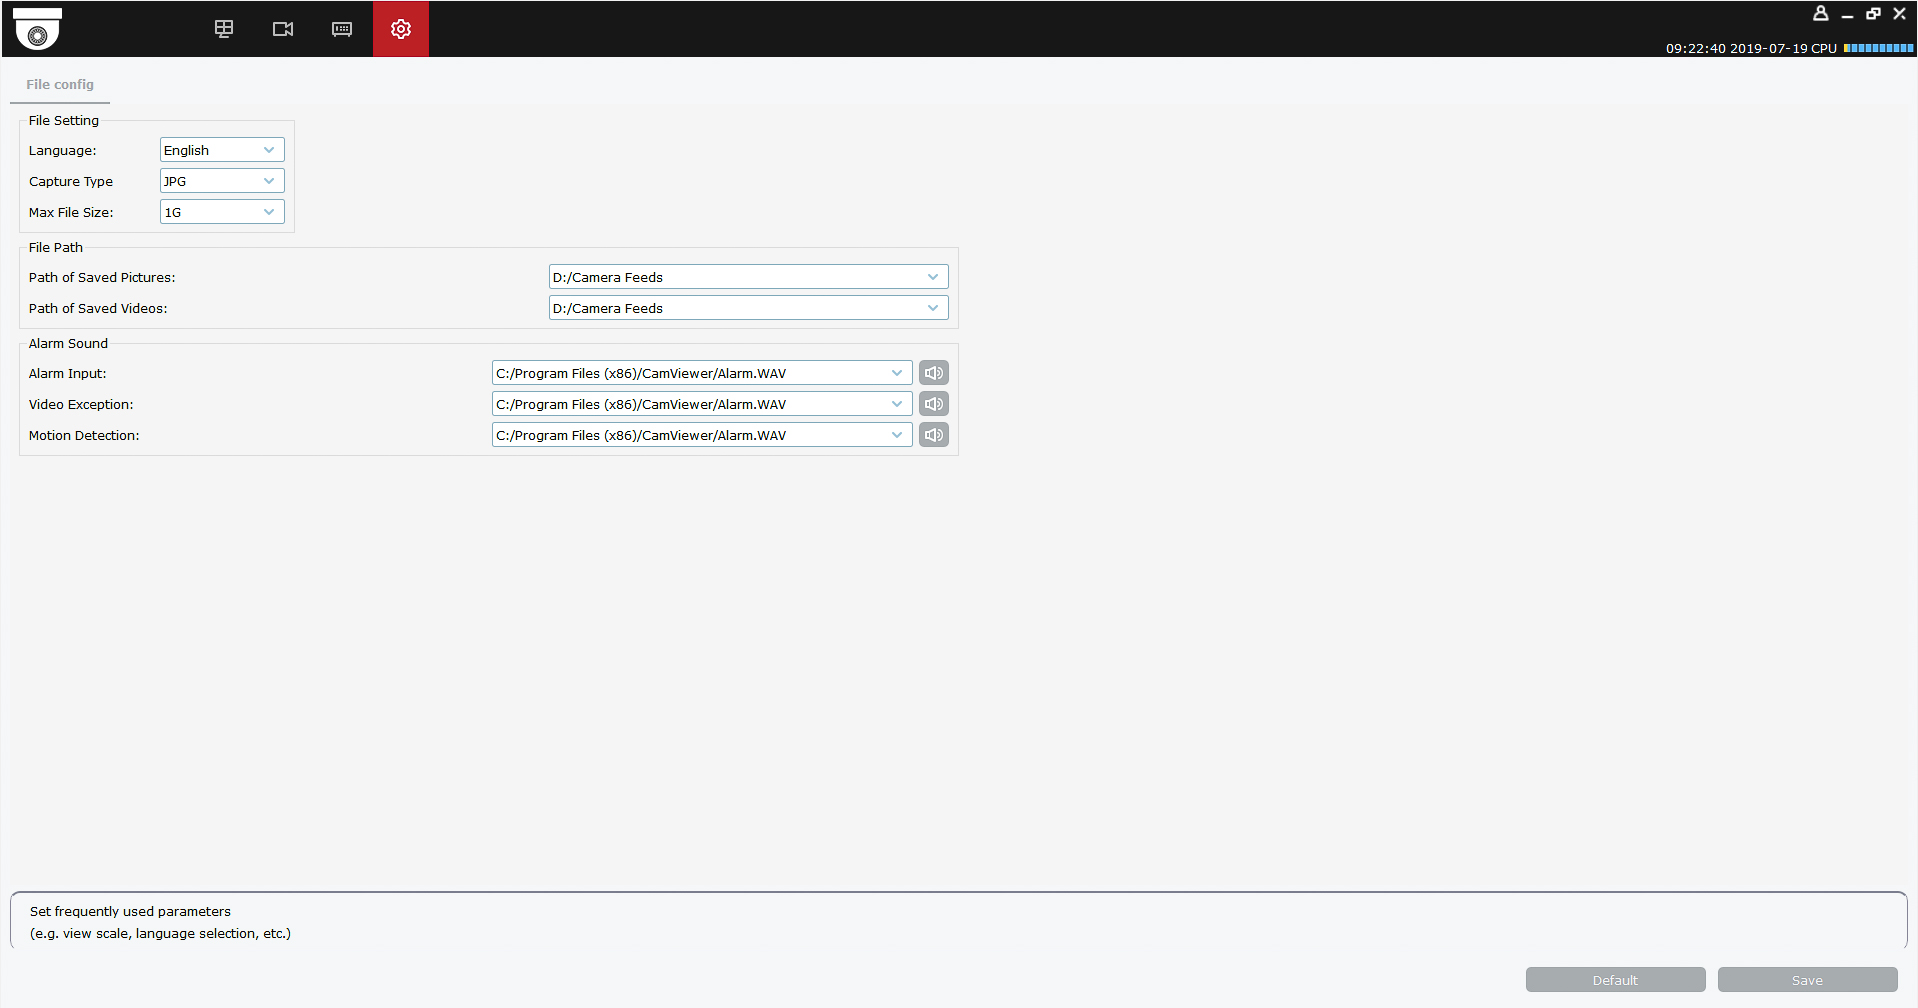
Choose Your Destination
Under “File Path,” determine where you’d like to save your exported video and photos, then click "Save."
You are now ready to export video from your NVR hard drive straight to your computer.
Exporting a Recorded Clip from your NVR's Hard Drive to your Computer's Hard Drive
Navigate to the “Remote Playback” menu
To get to this screen, click on the video camera icon at the top of the screen.

Search for the clip you’d like to export using the calendar on the left side of the screen
You can also select which channel(s) you’d like to search for. Using the filter menu at the bottom-left, you can narrow down your search to a specific event or time range. Here you can also toggle synchronous playback, which allows you to select one playback time for every channel (if enabled) or select playback times individually for each channel (if disabled).

Click the “Download” icon under the playback monitor
Select the clip or clips you wish to export and click “Download”
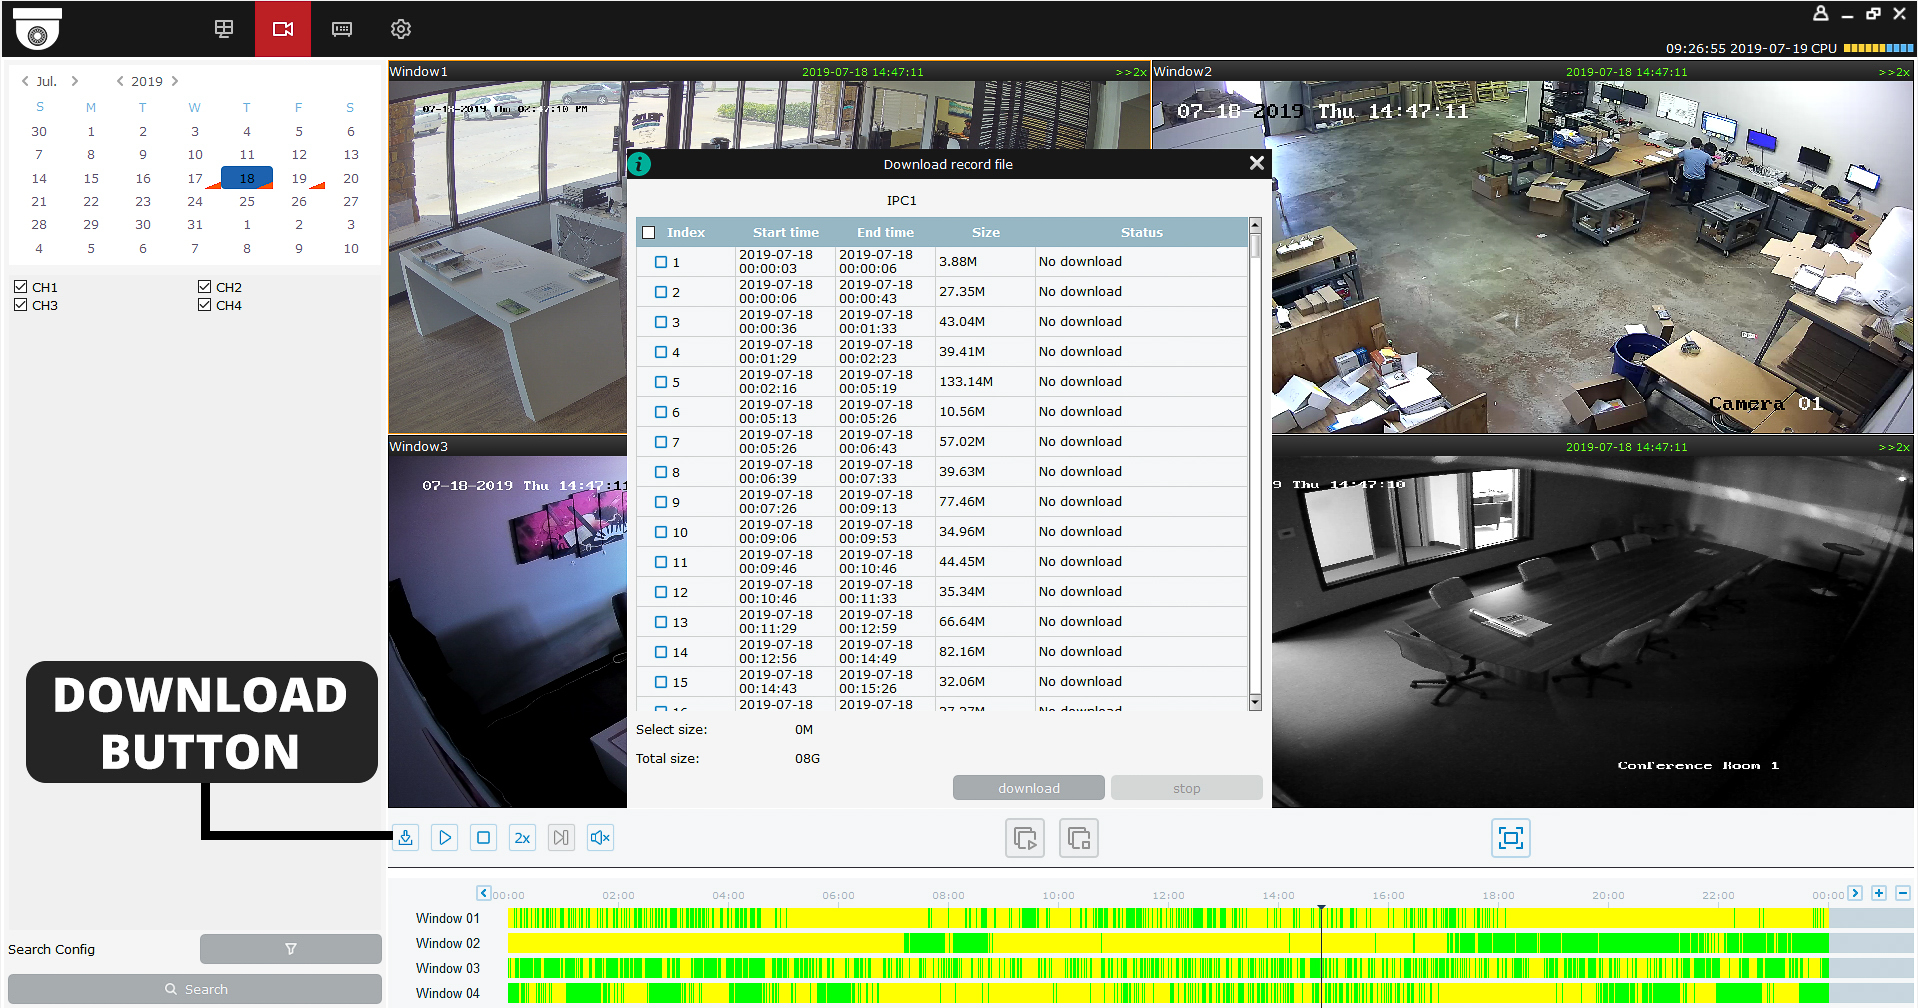
Alternatively, you can export a clip during playback by using the "Record" button from the playback channel interface. Click the button once to begin recording, then click it again to stop the recording.
Congrats! You have successfully exported video from your NVR hard drive to your computer. You’ll find your file in the location you set up in the previous subsection, "SYSTEM CONFIGURATION"
Exporting a Manually Recorded Clip to your Computer's Hard Drive
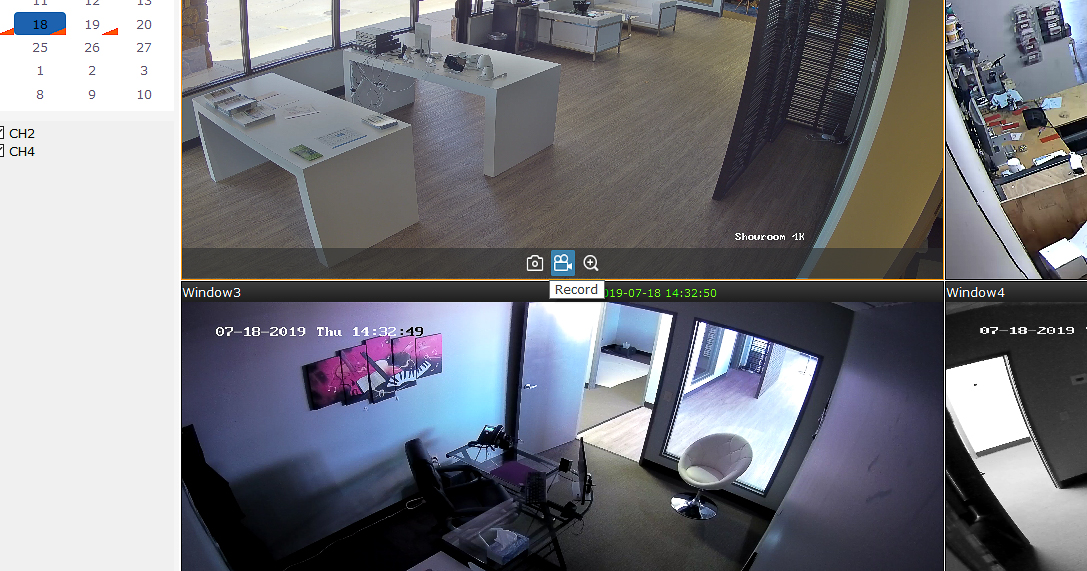
From the live screen in the “Mainview” tab, you can export video to your computer by manually recording a clip. Since you’re recording the clip directly from the CamViewer application, an NVR hard drive is not required for this method.
Click the Record Icon from the Main Screen
Hover your mouse over the channel you wish to record and click the “Record” icon, which looks like a video camera. Click the icon once again to end the recording.

And that’s it! You have successfully saved a manually-recorded video to your computer. You’ll find your file in the location you set up in the previous subsection, "SYSTEM CONFIGURATION"