In this guide, we will show you how to setup your R-Series recorder without an internet connection.
If you are one of the rare earthlings who doesn’t have an internet connection at the location where you are installing your R-Series recorder, do not fret! We got you covered.
Go ahead and wire and power up your system as shown in the initial setup guide, then follow these instructions.
Install the Configuration Tool on your PC and open up the program
Make sure your PC is on the same network as your R-Series recorder. The configuration tool can be found on the CD that came with your product or you can download the tool on our R-Series quick start page.
Open the program. You should see your device shown:
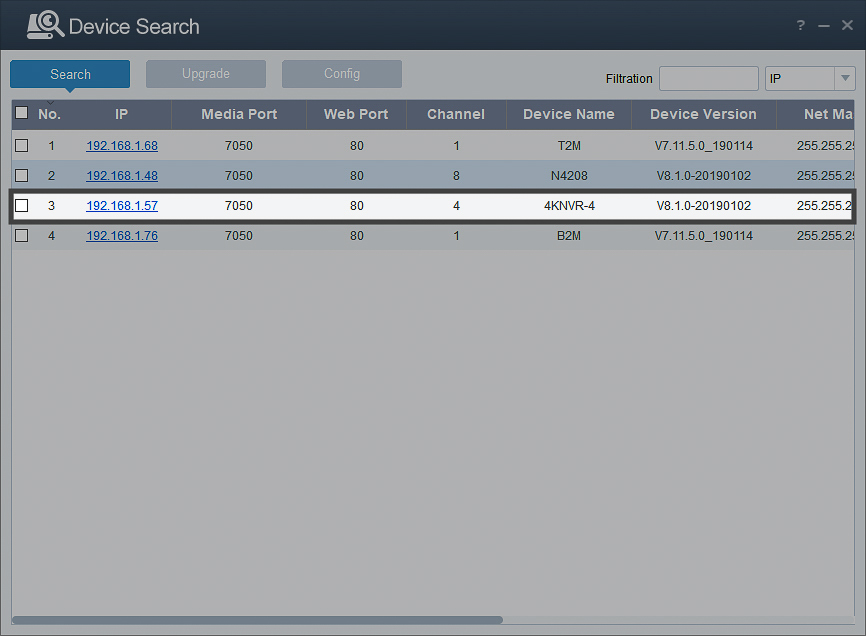
Click on the checkbox next to the IP address of your recorder
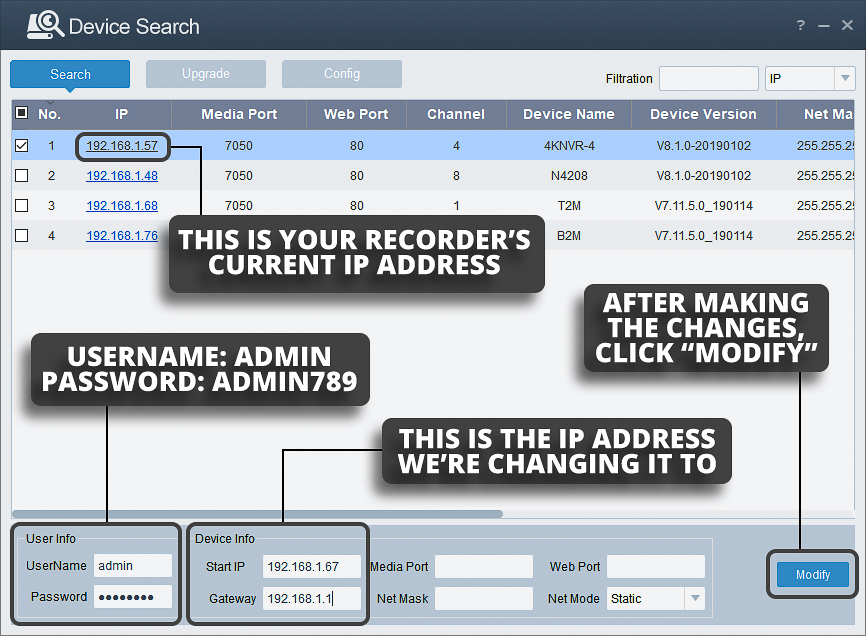
Enter the username and password:
| 1 | Username: | admin |
|---|---|---|
| 2 | Password: | admin789 |
Change the Net Mode to "Static" and click "Modify."
Be sure to write down your IP address! You will need it later.

Optional Step
If you prefer to set your own IP address, do all the steps above, but right before you click Modify, you can enter in your IP address and Gateway into the fields shown (Entering the port numbers and Net Mask is not needed).
In this example, we are changing the IP address from 192.168.1.68 to 192.168.1.67:
Log into the CamViewer program using the IP address from above.
Instead of entering your product ID, enter the IP address that you recorded above. You will now be able to acces your recorder through the CamViewer application without internet access.